
A properly sealed HVAC system ensures steady comfort while minimizing energy use. When air escapes through ducts, walls, or around windows, conditioned air never fully reaches your living spaces. This makes the system work harder, raising both energy bills and wear on key components. Identifying and repairing leaks is one of the most effective ways to boost efficiency and maintain comfort, and scheduling professional HVAC service can help address these issues before they become costly problems.
Why air leaks are a problem
Every bit of air lost through gaps or cracks represents wasted energy. Leaky ducts can lose 20–30% of the air your HVAC produces, especially in unconditioned spaces like attics or basements. This not only reduces comfort but also increases your energy bills. Air leaks also cause uneven temperatures, drafts, and humidity issues throughout the house.
Signs your home has air leaks
- Uneven temperatures between rooms.
- Weak airflow from some vents.
- Dust accumulation near registers or duct joints.
- Higher-than-usual heating or cooling costs.
- Drafts around doors, windows, or baseboards.
- Whistling or hissing sounds when the HVAC is running.
If you notice any of these symptoms, it’s time to inspect your ductwork and home envelope.
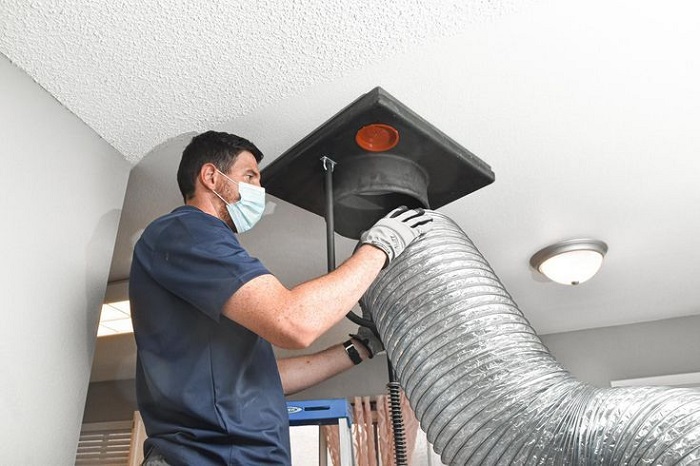
Step 1: Inspect visible ductwork
Start with areas you can access easily — attics, basements, crawl spaces, or utility rooms. Look for disconnected joints, visible gaps, or holes caused by corrosion. Hold a small piece of tissue near the joints while the system is running; if it flutters, air is leaking. Check for streaks of dust around seams — another sign of escaping air.
Step 2: Seal small leaks with mastic or foil tape
Once leaks are located, seal them with HVAC-approved mastic sealant or metallic foil tape. Avoid using standard cloth duct tape; it dries out quickly and loses adhesion. Mastic provides a durable, flexible seal that withstands temperature changes. Apply it evenly over gaps, especially at joints and elbows, and let it cure fully before turning the system back on.
Step 3: Insulate ducts in unconditioned spaces
Even after sealing, ducts in attics or basements lose heat or cool air through uninsulated surfaces. Wrap them with insulation sleeves or fiberglass duct wrap, ensuring a snug fit without compressing the material. Proper insulation prevents condensation, reduces temperature loss, and keeps airflow stable.
Step 4: Check air returns and registers
Leaky return ducts can pull in dust or unfiltered air from walls and attics, lowering indoor air quality. Make sure all return registers are properly connected and sealed. Tighten the mounting screws and use caulk or foam sealant around the edges to close small gaps between the grille and wall.
Step 5: Test for leaks around windows and doors
Air leaks aren’t limited to ducts — they often occur around window frames, door thresholds, and attic hatches. Close all windows and doors, then light an incense stick and move it around frames and baseboards. If the smoke wavers, there’s a draft. Use weatherstripping or caulk to seal these gaps. In older homes, adding door sweeps and insulating foam can dramatically improve comfort.
Step 6: Seal gaps in the building envelope
Small cracks around electrical outlets, plumbing penetrations, and recessed lighting can also leak air. Use expanding foam or silicone sealant to close these openings. Attic and basement leaks are especially important to address, as they allow large volumes of conditioned air to escape.
Step 7: Professional duct testing
For hidden or extensive leaks, professional duct pressure testing (called a “duct blaster test”) measures total air loss in your system. Technicians pressurize the ducts, identify leaks with diagnostic tools, and provide a detailed report. They can also perform professional-grade sealing using aerosolized sealants that reach inaccessible areas.
Benefits of sealing air leaks
- Lower energy bills: Less air loss means shorter HVAC cycles.
- Improved comfort: Even temperatures across all rooms.
- Better air quality: Fewer contaminants drawn from dusty areas.
- Longer equipment life: Reduced workload on fans and compressors.
- Quieter operation: Proper sealing eliminates whistling or rattling noises.
Maintenance to prevent future leaks
- Inspect ducts annually for new gaps or loose joints.
- Replace filters regularly to maintain proper air pressure.
- Schedule HVAC service twice a year to check airflow balance.
- Reapply sealant if you notice dust or temperature drops near vents.
When to call a professional
If air leaks persist despite sealing visible areas, contact a certified HVAC technician. They can perform a full airflow audit and use specialized tools to locate leaks behind walls or under floors.
A tightly sealed HVAC system delivers consistent comfort, runs more efficiently, and saves money over time. With a few hours of inspection and proper sealing, you can eliminate hidden air leaks and enjoy a more stable indoor climate throughout the year